Virtual Data Enclave
This page holds documentation on various aspects of using the Virtual Data Enclave (VDE) service that ICPSR offers. Please review the various links and documents below for more information about the usage of the VDE and programs within it.
Omnissa Client
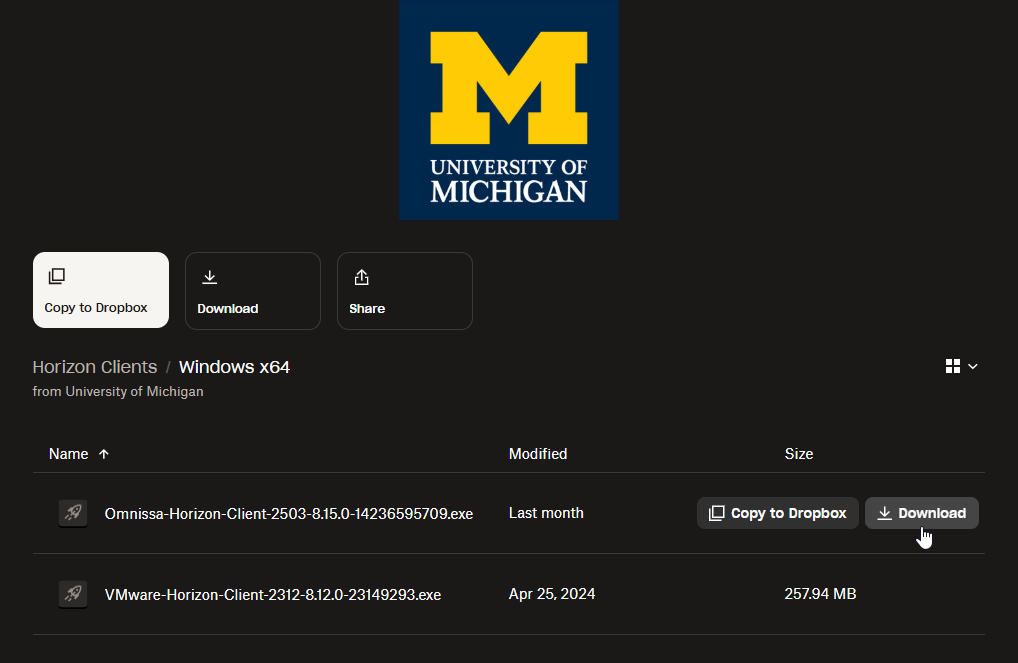
Download the Omnissa Horizon Client required for accessing the VDE. These are hosted on Dropbox by the MiDesktop team. Then follow the installation instructions below.
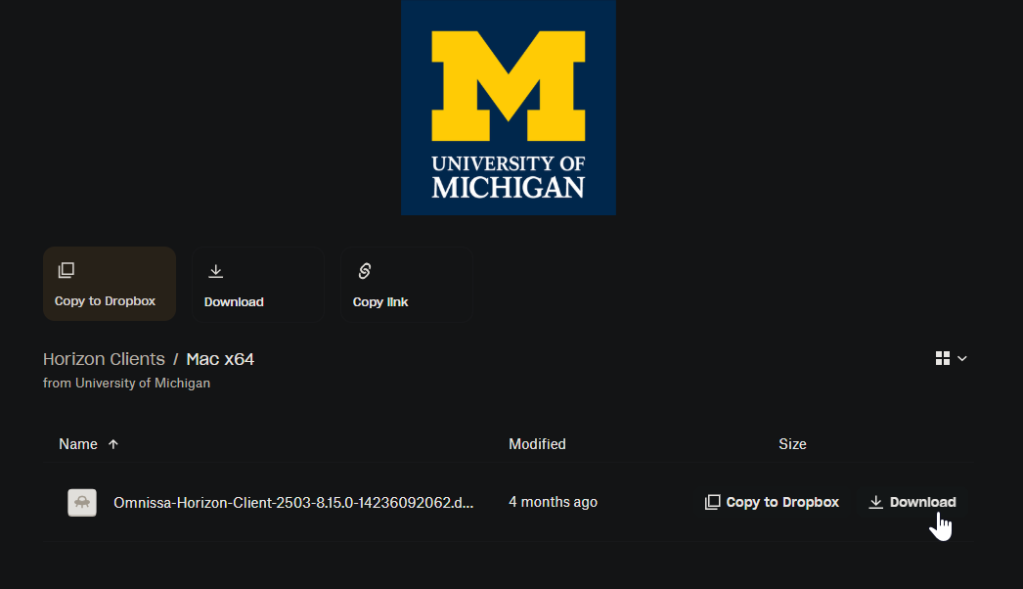
- Download the Omnissa Horizon Client Installer from the University of Michigan MiDesktop Dropbox Folder. You will want the most recently modified file as that is the newest version of the client.

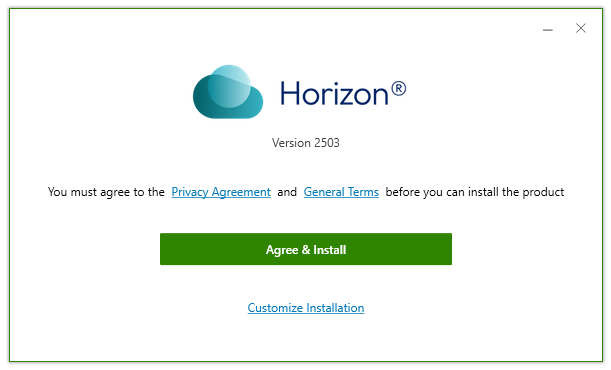
2. Double-click the installer (*.exe file) to begin the process. Click the Agree & Install button to continue.
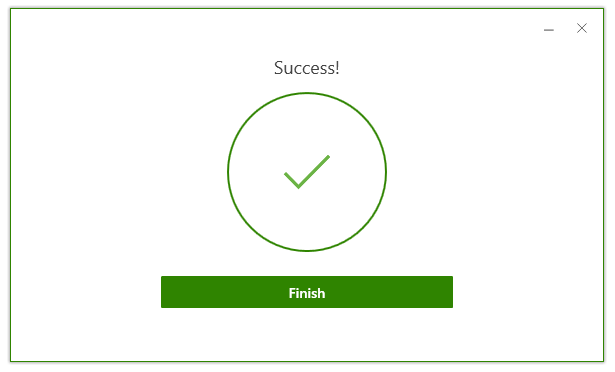
3. Click the Finish box. A reboot will be required to complete the installation.
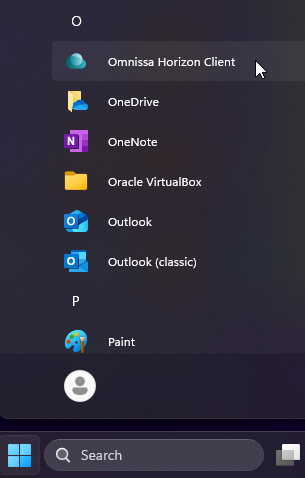
4. Once the reboot is complete, open the Start menu, and click the Omnissa Horizon Client to begin using the application.
- First, download the Omnissa Horizon Client Installer from the University of Michigan MiDesktop Dropbox Folder. You will want the most recently modified file as that is the newest version of the client.
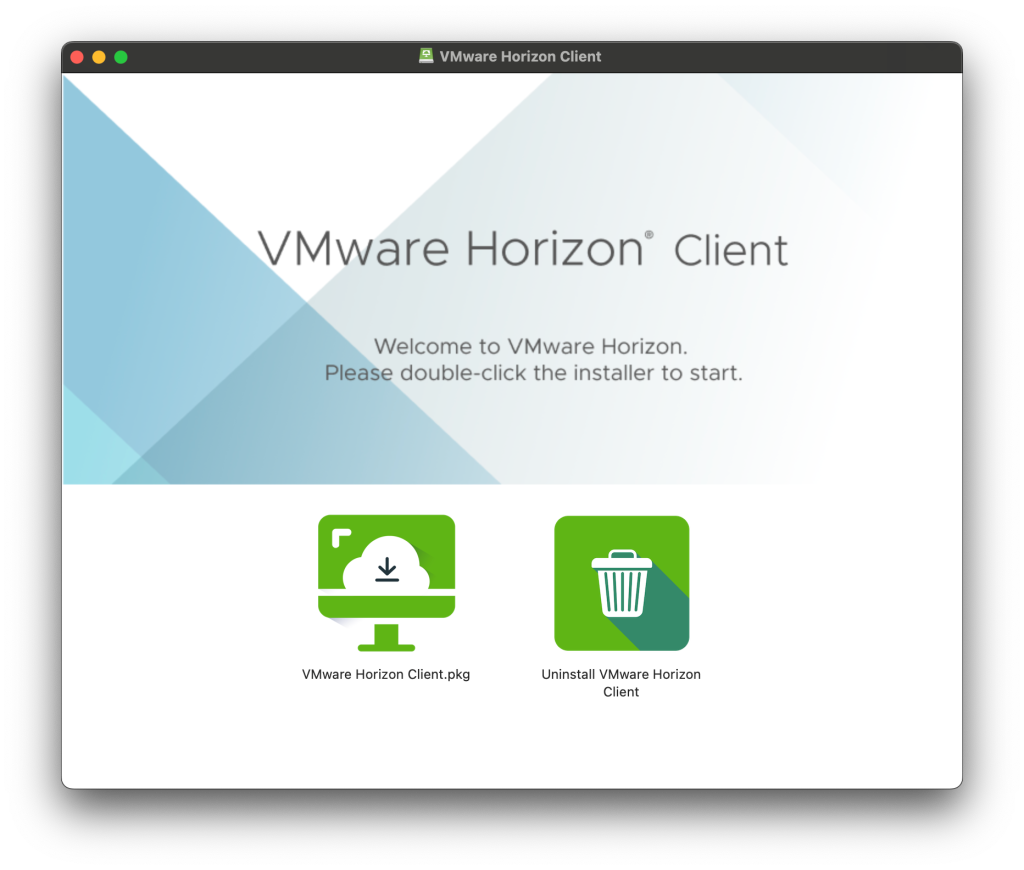
2. Double-click the installer (*.dmg file) from your Downloads folder to begin the installation process. Double-click the VMware Horizon Client.pkg.
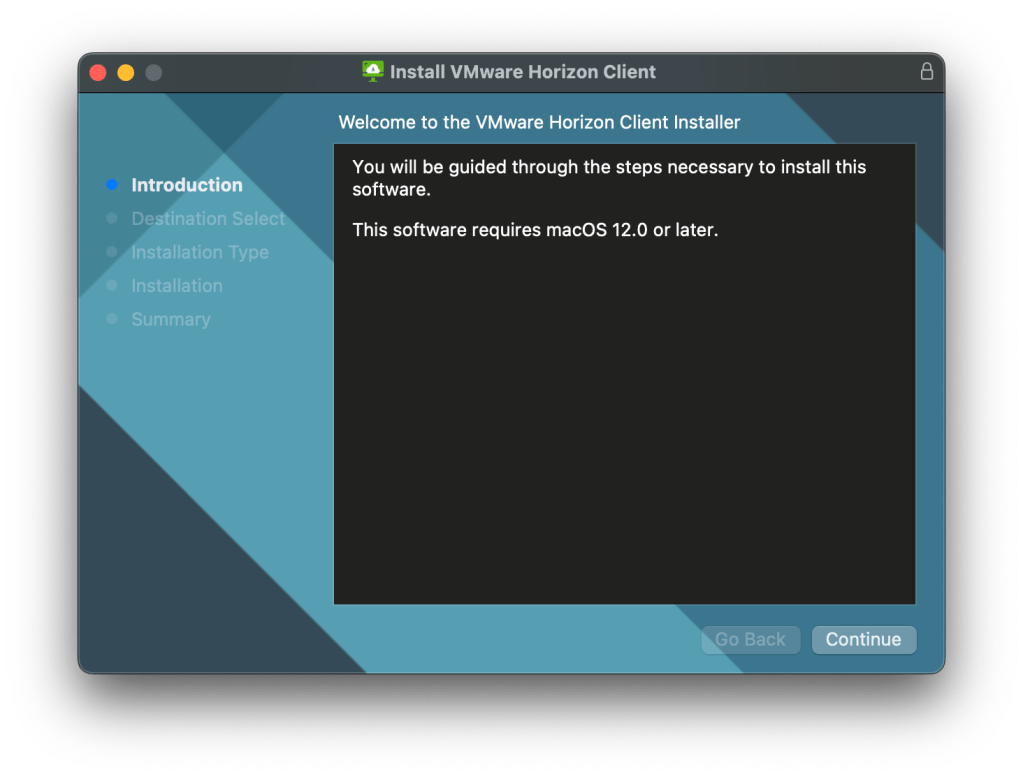
3. Click the Continue button.
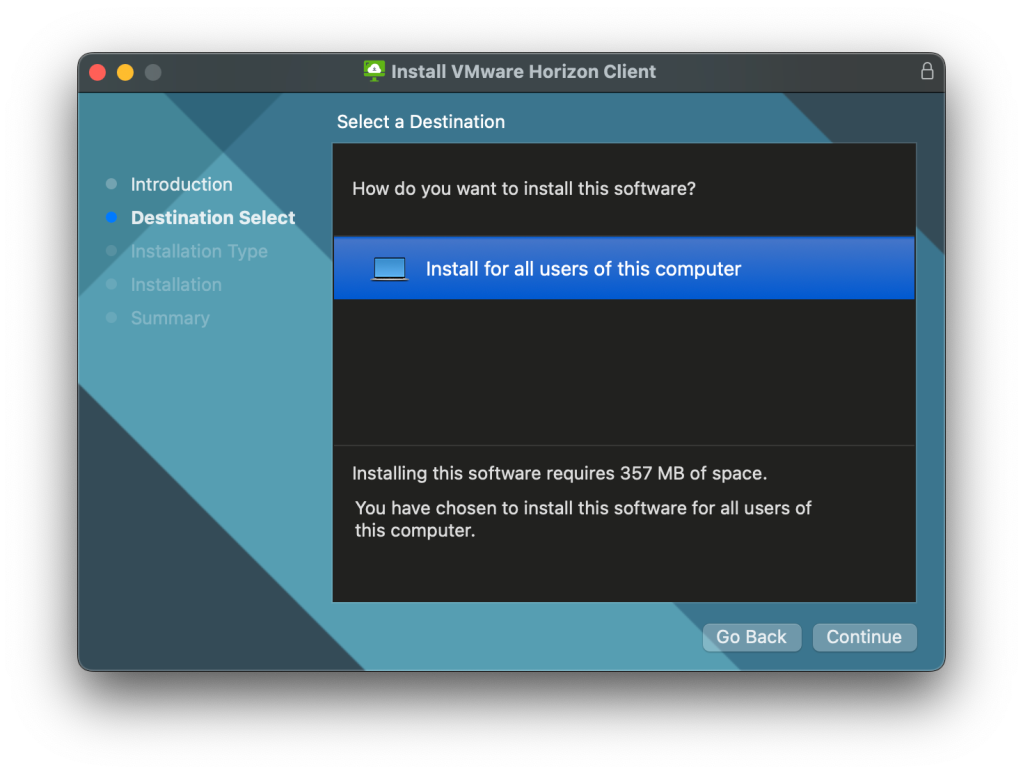
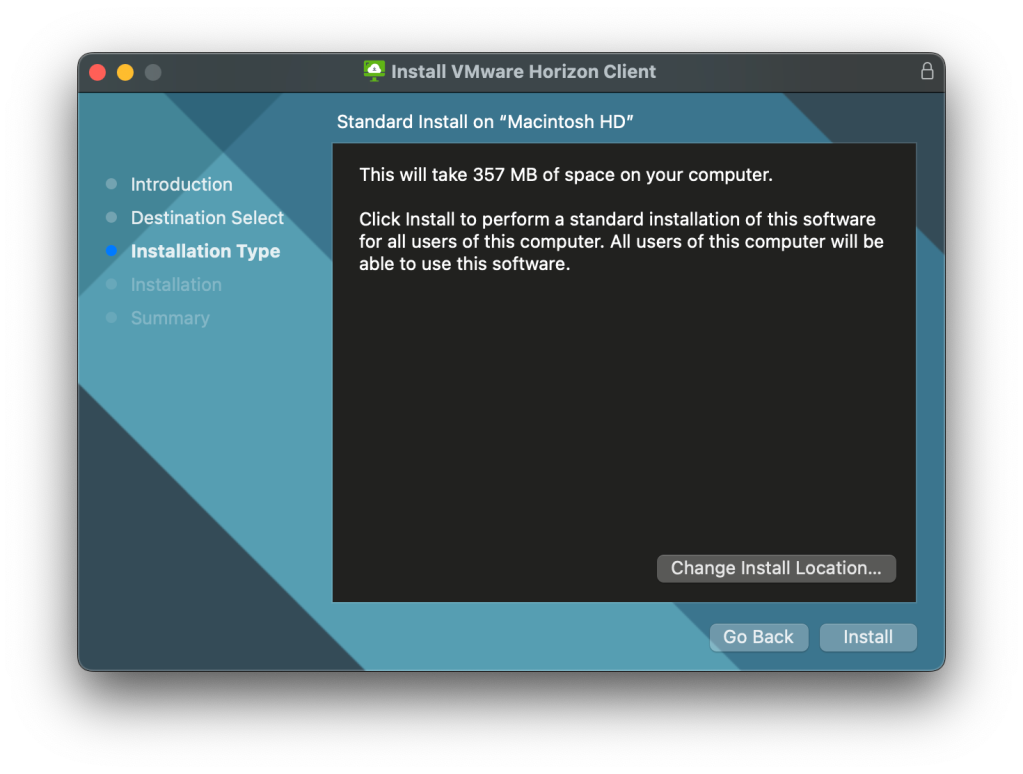
4. Click Install for all users of this computer and click the Continue button.
5. Click Install.
6. Click the Close button after the installation completes successfully.
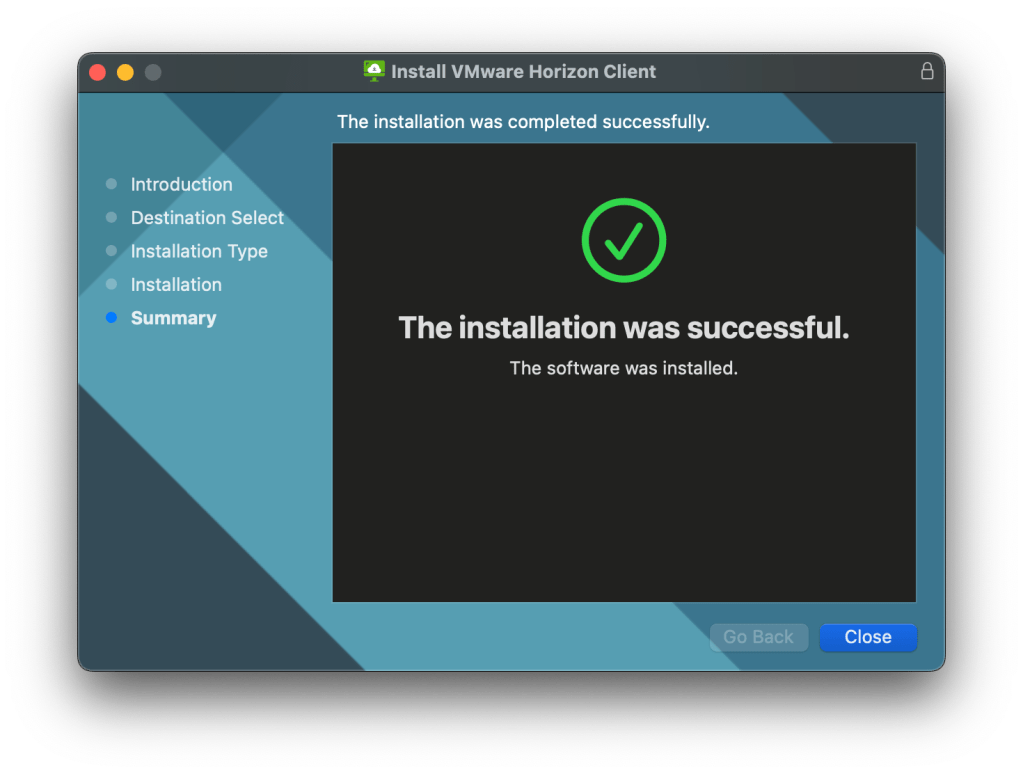
7. The Omnissa Horizon Client can be located in the Applications folder.

- Launch the Omnissa Horizon Client app from the Applications folder on a Mac or the Start Menu on a PC. If it is your first time connecting: Click the Add Server button to define your connection server.
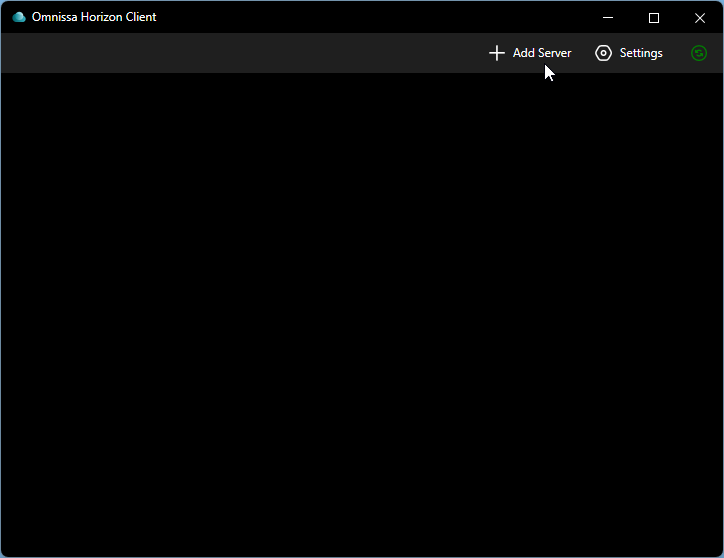
2. In the server dialog box enter the name of the Horizon Connection Server as: vde.icpsr.umich.edu

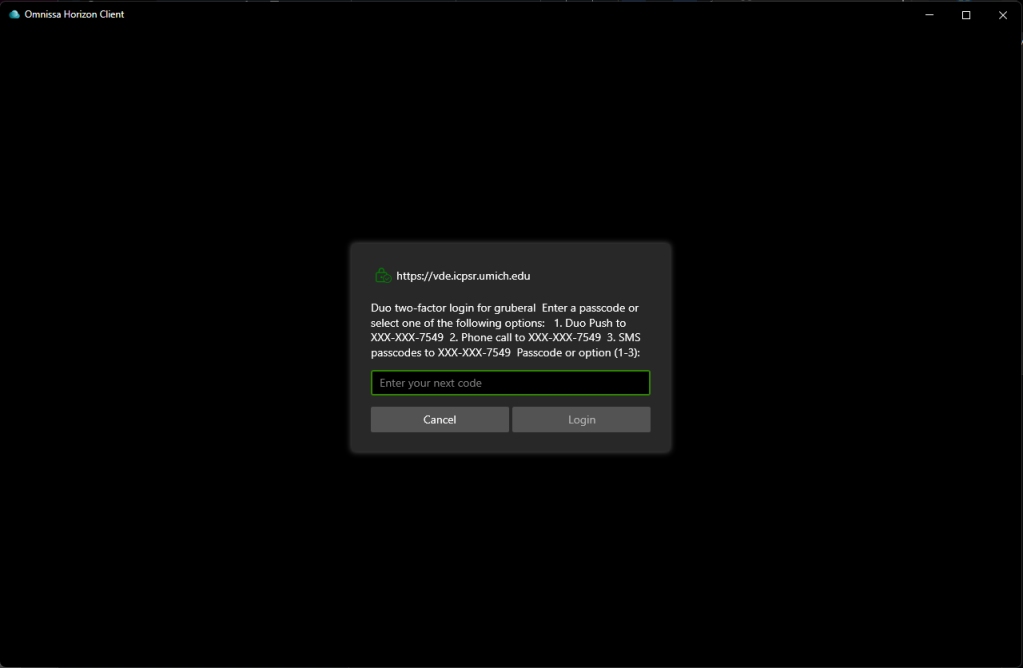
3. A dialog will prompt you for your username and a passcode. The passcode is your password that was provided by UM staff. Click the Login button to proceed.

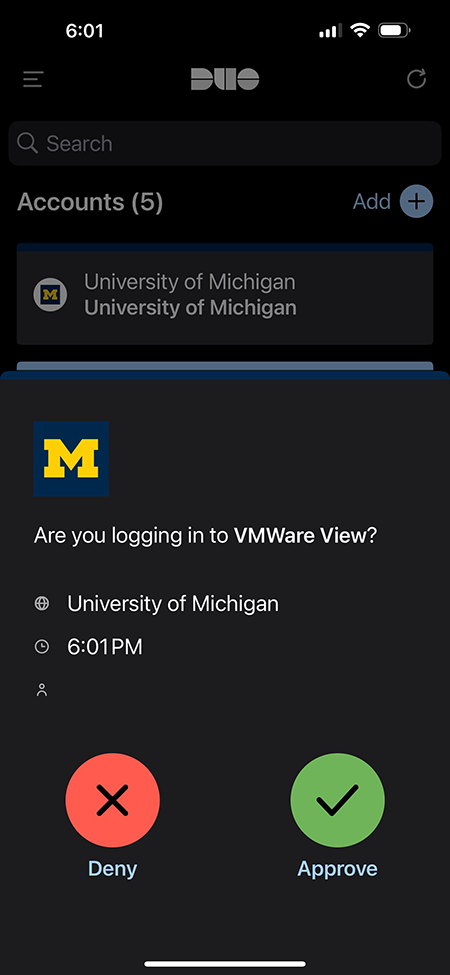
4. Next, you will be prompted for Duo Two-Factor approval. The prompt may have more or less options based on how you configured your Duo account.
Choose one of the following options:
OPTION 1 (RECOMMENDED): Type ‘1’ and click ‘Login’ to receive a push notification to your smartphone for approval via the Duo Mobile App.
OPTION 2: Type ‘2’ and click ‘Login’ to receive an automated phone call for approval. Once you are on that phone call, press “1” on your phone’s keypad to approve the login.
OPTION 3: Type ‘3’ and click ‘Login’ to receive a passcode via SMS. Then enter the token code received via a normal text message (SMS). Or enter the token code displayed on your smartphone app or hardware token.
5. If you chose a push notification: Once the Duo app is open, click the green ‘Approve’ button. You will then automatically be logged in. If you receive a push notification when you did NOT attempt to login, press the red ‘Deny’ button to deny access.
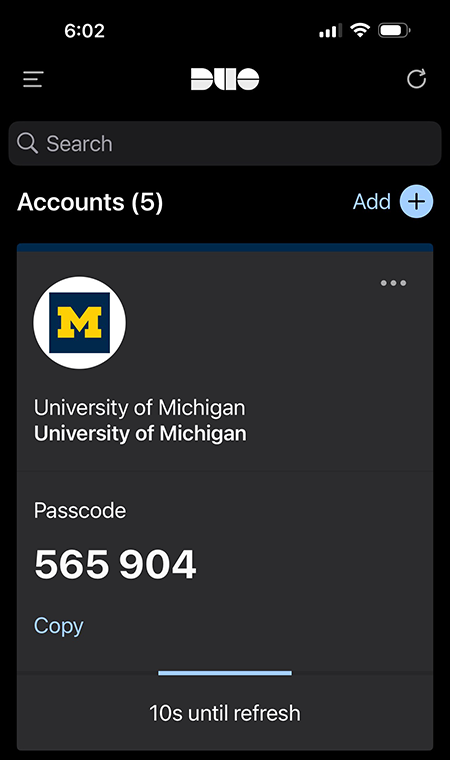
6. If you cannot receive a push notification, open the Duo Mobile app and press the green key icon. A 6-digit passcode will appear. Enter that passcode on the VDE Duo-factor login screen. Note that the passcode changes every 60 seconds. You must enter the current passcode to be approved.
7. It should automatically launch the VDE and load the remote Windows environment, but if it does not, just double-click the icon labeled ICPSR VDE.

Software Available in the VDE
Curious what software is available in the VDE? Here’s the currently available software and the currently deployed version (major versions only; software is updated regularly).
- 7zip
- Acrobat Reader DC
- Git
- IBM SPSS Amos 32
- IBM SPSS Statistics 32
- IrfanView
- IVEWare/SRCware
- LibreOffice
- Matlab R2025
- MAXQDA 26
- Microsoft Edge
- Miniforge 26
- Mplus combo 9
- Notepad++
- QGIS
- R v4.6
- RStudio Desktop 2026
- SAS 9.4
- SAS PROC LCA & LTA
- Stat/Transfer 17
- Stata/MP 19
- SUDAAN SAS-callable 11
- Thorium
- VSCode
Computer System Specs in the VDE
- Operating system: Windows 11 22H2
- Memory: 16GB
- Architecture: x64
Stata comes pre-configured with a number of useful settings in the VDE. We also maintain a repository of useful Stata .ado files for your use.
Boston College Statistical Software Components (SSC)
The Boston College Statistical Software Components (SSC) archive is a distributed database that makes a large number of Stata programs available. The SSC archive is maintained by Kit Baum ([email protected]) at the Boston College of Economics. It mirrors the contents of the RePEc (Research Papers in Economics) series Statistical Software Components, available from IDEAS (http://ideas.repec.org/s/boc/bocode.html) and EconPapers (http://econpapers.repec.org/software/bocbocode/).
The Stata Files Repository
The SSC is automatically configured to be available to all users of the VDE. ICPSR has this configured as a mapped drive assigned as the “S:” drive in the VDE. In addition, Stata is configured to be aware of this repository with no user configuration required.
Loading .ado Files From the Local Repository
The S: drive holds all local .ado files and requested packages. Importing these files into your workflow can be done with the following command:
net install {packagename}, from("S:{first letter of package}")
Example importing the match package:
net install match, from("S:m")
This will allow the import of any .ado file you have access to, and you can reference the absolute file location inside the quotation marks.
Third-Party .ado Files
If you have additional .ado files you need imported to the VDE, our team can load those into your project’s environment. Submit a support request to [email protected] with the additional file you need and we will add it to your project directory. This is the folder with your Principal Investigator’s name in it and is typically mapped as the “H:” drive in the VDE.
Need Help?
If you are new to Stata and need to learn more in general, we recommend visiting Stata’s learning portal. However, if you are experiencing issues that seem to be unique to the VDE, please reach out to us via email at: [email protected].
ICPSR maintains the latest installations of both R for Windows and RStudio Desktop in the VDE. Continue reading to learn more about some of the more advanced details of working with R in the VDE. Some things may be different than you are used to based on the security requirements of the VDE. If you need general help with R, we recommend the R-Project’s help page or manuals as good places to start.
Repository Packages, CRAN, and Ralt
About Packages
Packages are collections of R functions, data, and programming code. They are installed in libraries. A library is a file system directory that contains a subdirectory for each package. R provides a main library, R_HOME/library, that contains a set of standard and recommended packages.
VDE Restrictions
Because the ICPSR virtual data enclave (VDE) is on an isolated network, you are not able to access repositories on the internet. ICPSR provides a mirror of the CRAN repository within the VDE. Non-CRAN packages are not allowed on the VDE.
ICPSR has the CRAN repository automatically mapped as the “R:” drive in Windows. ICPSR’s installation of R in the VDE is automatically configured to be used as the source to install any package that is in the CRAN repository.
Package Management
About Libraries
Packages are installed in libraries. A library is a file system directory that contains a subdirectory for each package. R provides a main library that contains a set of standard and recommended packages. you can install additional packages to one or more personal libraries. By default, R creates your personal library in your home directory at
%USERPROFILE%DocumentsRwin-libraryx.y}, where {x.y} indicates the installed version of R.
Best Practices for Libraries
ICPSR recommends that you DO NOT use the default personal library. A disk quota is imposed on your VDE home directory and you may exhaust all available storage space if you install a large number of R packages. Instead, create a personal library in your VDE project folder. For example, if you want to install packages to H:RR_Lib, create those subfolders. Next, edit your .Rprofile to add your library to the library search path. R can access installed packages that are included in the library search path. That search path is initialized at startup. You can display the library search path in R with the command.
.libPaths()
Installing Packages
The install.packages() command installs packages to the first element of .libPaths() unless a library is supplied as an argument. If you have setup your .Rprofile as above, then this will be in H:/R/R_Lib.
Each package that you install consumes some of your allocated storage. Install only the packages that you need and uninstall them when you no longer need them. ICPSR recommends that users create their personal library in their project folder and configure their .Rprofile prior to attempting to install packages from the repository. Installing packages to the default location in your documents can cause issues as your Documents folder is under a much smaller quota than your Project directory.
A precompiled binary package for the Windows operating system has a *.zip filename extension. To install it, use the R command install.packages(). Provide the full file path to the package binary. Add the argument repos = NULL because the package is not supplied from a repository. For example, assume that you want to use a package demoxyz which is not part of the CRAN repository. You would install it to your personal library using the following command:
install.packages("R:/Ralt/demoxyz.zip", repos = NULL)
.Rprofile and Startup Configuration
About .Rprofile
You can use the .Rprofile file to configure your R workspace. You can use that file to add your personal library to the library search path. If you have an existing .Rprofile file in your home directory, open it in Notepad. Otherwise, open Notepad so that you can create the file. Add a new line to the file to define a library search path that includes your personal library. If your personal library is located in your project folder (mapped to drive letter H: in the folder RR_Lib then you would add the following command to .Rprofile.
.libPaths(c("H:/R/R_Lib", .libPaths()))
If you have multiple libraries to add, your .Rprofile will look like this instead.
.libPaths(c("H:/R/R_Lib", "H:/Other/Library/Path/Here", .libPaths()))
If you defined a different location for your personal library, edit the command accordingly. Save .Rprofile to your Documents folder. The settings in your .Rprofile will be applied every time that R is launched.
Rstudio Issues
RMarkdown Installation
If you need to install RMarkdown, attempting to do so through RStudio will not respect the .rprofile.site file that tells R to use the R: drive as a package repository. Instead, please do:
install.packages(c('base64enc', 'digest', 'evaluate', 'glue', 'highr', 'htmltools', 'jquerylib', 'jsonlite', 'knitr', 'magrittr', 'markdown', 'mime', 'rmarkdown', 'stringi', 'stringr', 'tinytex', 'xfun', 'yaml'))
Blank Window or Crashes
If you encounter a blank window, or Rstudio crashes to desktop, first check that you followed the steps above for RMarkdown Installation if you are using RMarkdown. If that is not the cause, please see the following PDF outlining steps to resolve a compatibility issue with the Omnissa Horizon Graphics Driver.